Building Gaia
In this thread I will cover my experience building the Gaia interface from the source code. I followed the Quickstart Guide at MDN.
Note: I used a linux distribution based on Ubuntu Precise (12.04). This is not meant to be a guide, I’m just merely documenting my experience.
Getting the Source Code
The source of the Gaia interface is located at https://github.com/mozilla-b2g/gaia. It uses the Git version control system. To copy the code to my computer, I used the clone command
git clone https://github.com/mozilla-b2g/gaia.git
Git will copy the source code to a folder named gaia in the directory in which the command is run.
Compiling
As mentioned before, Gaia is created using HTML, CSS, and Javascript. As such, most linux distribution will contain everything that is needed to compile the source code. Most of the compiling is just minimizing and unifying the CSS and javascript files. There are different compiling options available
-
default -
push to device: This will push the new build to the device usingADB. Optionally, you can usereset-gaiato remove profiles, web app, and database entries (essentially resetting the phone for the specific build).make install-gaia -
production: phone is prepared for a production environment. Gaia is run as packaged apps (privileged and certified levels), test applications are not included int the build, remote debugging is disabled, the lock screen is turned off, etc.PRODUCTION=1 make # or optionally you can use make production -
debug: runs gaia as a hosted application on a local webserver. This allows apps to be tested without repackaging the apps. It also allows specific developers tools (that will be mentioned in more detail later on) to function.DEBUG=1 make -
device debug: this disables the lock screen on the device and enables ADB debugging. Only useful if you have a deviceDEVICE_DEBUG=1 make
There are more options but they are not too relevant to most scenarios. I used the debug option because it allows me to debug applications really easily as explained in the next section.
Testing
The fastest way to test any changes to Gaia is to use a nightly build of Firefox. I downloaded last nights build and extracted the archive. To test gaia I simply ran the following command in the directory I extracted the nightly build
./firefox-bin -profile <gaia dir>/profile-debug/ -no-remote
<gaia dir> is the path to the directory where the Gaia source code is located. The -no-remote options will prevent the nightly build from interfering with any other firefox instances currently running.
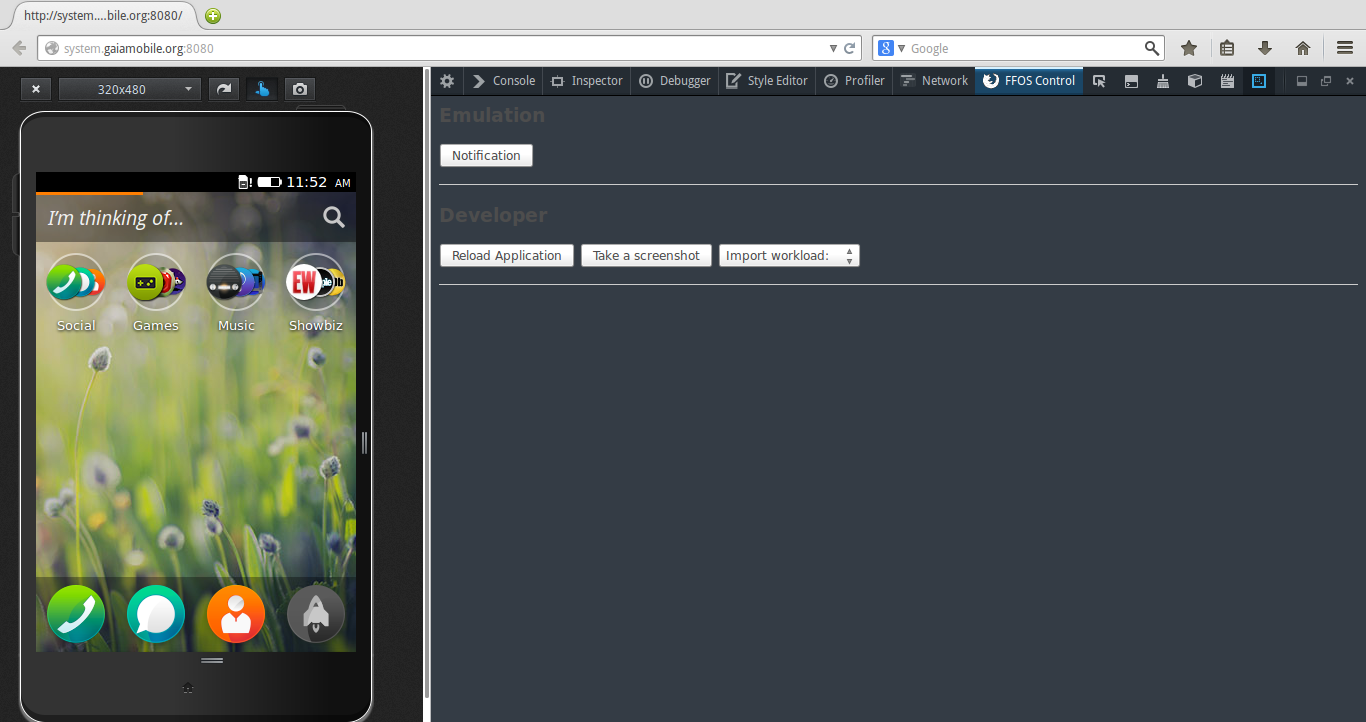
After much a lot more than I should have had, I was met with the following sight.
Making Changes
Now get familiar with the workflow, I made a small change to the Contacts app to see if everything my developing environment was setup correctly.
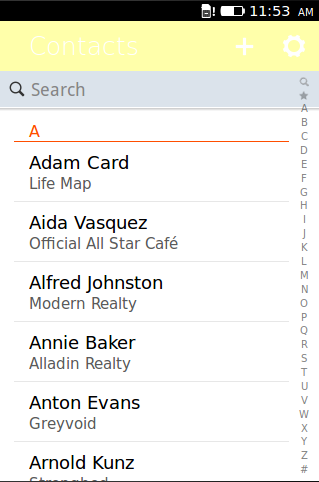
Here’s what the Contact app looks like when on the first start
First, I closed the instance of the Firefox Nightly I had running. Then, I I added the following rule to the file located at /apps/communications/contacts/style/app.css
section[role="region"] > header:first-child {
	background-color: #FFA;
}
I recompiled the the project…
DEBUG=1 make
Started up the Firefox Nightly again…
./firefox-bin -profile <gaia dir>/profile-debug/ -no-remote
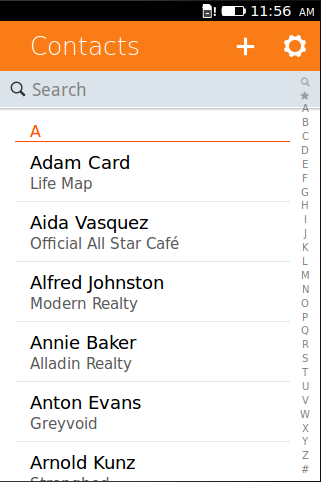
And Voila! I got the following result
Recent Blog Posts
- 20 Jan 2026 » I love the old man minimap in VS Code
- 03 Jan 2026 » On Resurrecting a 12 year old blog
- 09 Oct 2014 » Updating a forked Git repo
- 06 Oct 2014 » ADB access to remote server from local usb
- 30 Mar 2014 » Bug Progress: Day 2
- 27 Mar 2014 » Building the Emulator
- 11 Mar 2014 » Simple Notes: Edit Notes
- 10 Mar 2014 » Simple Notes: Hidden Notes Fix
- 07 Mar 2014 » Bug Progress: Day 1
- 06 Mar 2014 » Simple Notes: Date